07 October, 2009

Upgrading to Exchange 2007 SP2

Exchange 2007 SP2 Overview

Microsoft Exchange Server 2007 SP2 helps meet the challenges and business needs of any Organization with the stake in messaging system. Exchange 2007 SP2 is a mission-critical communications tool that enables employees to be more productive and access their information anytime from anywhere. For the Administrators, Exchange Server 2007 SP2 provides advanced protection options against email security threats, such as spam and antivirus as well as tools to help manage internal compliance and high availability needs.


Whats New in Exchange 2007 SP2


  • Enhanced Backup Functionality
    Exchange 2007 SP2 includes VSS plug-in for Windows Server backup to support Exchange backups. Once Sp2 is installed, Windows Server backup can be used for backup and restore of Exchange Server 2007 SP2 databases. The new plugin is delivered in the form of a single executable called wsbexchange.exe.

  • Deploying Exchange Server 2010
    Before deploying Exchange 2010 in the coexistence mode of Exchange 2007, all the CAS Server must be upgraded to Exchange 2007 SP2. In addition, all Exchange 2007 Server in Active Directory site, regardless to role must be upgraded to Exchange 2007 SP2.

  • Enhanced Auditing
    New Exchange auditing events and audit log repository enable Exchange Administrators to more easily audit the activities occurring on Exchange Servers. It allows the right balance of granularity, performance and easy access to audited events via a dedicated audit log repository. This simplifies the auditing process and reviewing of audited events in a dedicated location.

  • Dynamic AD Schema Validation
    The dynamic AD Schema update and validation feature allows for future Schema updates to be dynamically deployed as well as proactively preventing conflicts whenever a new property is added to the AD Schema. Once this capability is deployed it will enable easier management of schema updates and will support issues when adding properties that don't exist in the AD Schema

  • Public Folder Quota Management
    Exchange 2007 SP2 provides more efficient way to manage Public Folder Quotas by improving the cmdlets and removing the dependency authoring and visioning Administration to perform management tasks.

  • Centralized Organization Settings
    There are several new cmdlets parameters that have been added that enable centralized management of many of the Exchange Organization settings.


Step by step process for Upgrading Exchange 2007 SP1 to SP2

If you are upgrading Exchange 2007 Server in production, then make sure to have a restorable backup of Exchange Configuration and its databases. Although the upgradation is straight forward and come clean bu it is advisable to have the backups in place. During the upgradation process the Exchange services will be stopped and disabled. The downtime may vary from one server to another. You may plan for a downtime of 30 - 45 mins. See screenshots below


Once you are readyfor upgradation, download Exchange 2007 SP2 from the link. Extract SP2 and run setup.exe. You will get the screenshot as below


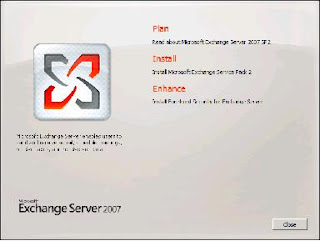
Click on install Exchange 2007 Service Pack 2


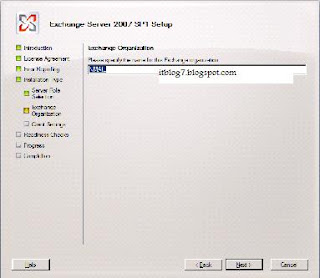
On the introduction screen click on next.


On the license page click on I accept and click on next.


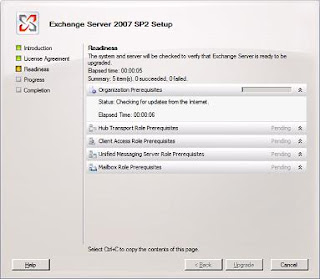
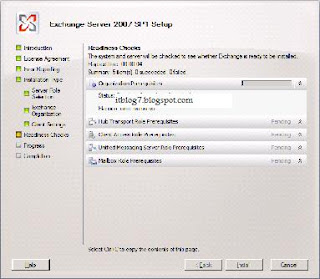
Readiness check will be performed. Once completed Click on Upgrade to start the upgradation.


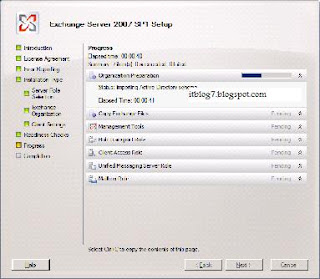
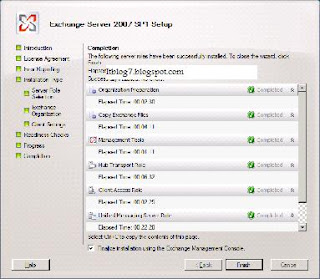
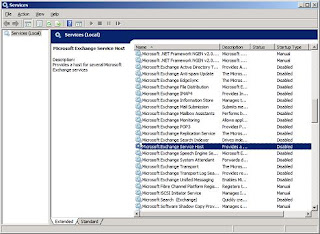
It will then start upgrading Exchange Server to SP2. During this process Exchange services will stopped.


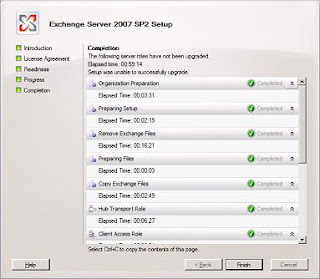
On successful completion page click on Finish. Your Exchnage Server is now upgraded to Service Pack 2.


Please let me know if the above article was able to provide you with the information you needed.

Deploying Exchange 2007 SP1

Exchange 2007 Server Roles
  • Mailbox Role: The Mailbox role provides email storage and advanced scheduling services for Microsoft Office Outlook users. The Mailbox Server role also includes public folders
  • Client Access Role: The Client Access Role (CAS) enables clients to connect to their Exchange mailbox through Outlook Web Access, POP, IMAP or through mobile device using activesync. this role also provides free buy lookup and offline address books.

  • HUB Transport Role: The HUB Transport role (HUB) provides routing within a AD Site. HUB Server can be used for applying messaging policies, security polices, antispam and antivirus policies to email messages in Transport.
  • Unified Messaging role: The Unified Messaging role (UM) role provides connectivity between a corporate telephony system and Exchange Server. Clients can access their mailboxes from any telephony or mobile device using Outlook Mobile Access (OMA) and perform almost the same functionality as OWA.
  • Edge Transport Role: The Edge Transport role performs antispam amd antivirus filterin and applies messaging and security policies to the inbound and outbound external messages in the transport. This role is deployed in the perimeter network.

Prerequisites for Deploying Exchange 2007

  • Domain Name System (DNS)

  • Windows 2003 based Active Directory.

  • The Forest and Domain functional level should be Windows 2003

  • The server on which Exchange needs to be deployed should be member of Active Directory Domain.

  • AD DS and IIS roles is required to be installed from Server Manager

  • .Net and Windows Powershell features is required to be installed.

By taking care of the above we are now ready for implementing Exchange 2007 SP1. Given below are the step by step process for implementing Exchange 2007 SP1. Pop in Exchange 2007 installable DVD and double click on Setup
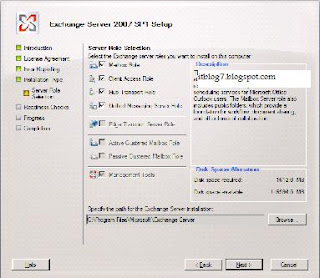
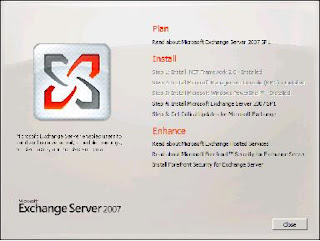
You will be presented with the above screen. Step 1, 2 and 3 will be highlighted if the required prerequisites are missing. For installing Exchange 2007 SP1 click on Step4. You will be presented with the below screen.


This screen provides brief introduction about Exchange 2007 SP1. Click on next


The next screen is for license agreement. Accept on the license agreement and click on next.


The above screen is for how you want to report errors to Microsoft. For this deployment sake I have selected No. Click on next to get the below screen.


The above window gives you the option to choose the role that needs to be deployed on the Exchange Server. Click on Custom to select the roles that needs to be deployed.


I have selected all the roles that can be deployed on a single server. Edge server can only be deployed in the DMZ. Click next.


Type the name of the Exchange Organization. For this deployment I have put as NMAIL. Click on next.

On the above select Yes if any of your users are using clients older than Outlook 2003. For this deployment I have selected No. Click on Next.


On this screen the setup does a readiness check before starting the installation. Once done click on Install


The installation process starts for the roles selected. Click on Next.

The screen above gives you the status of the deployment. You get completed for all the roles selected for deployment that indicates you are done with the deployment.
Please let me know if the above article was able to provide you with the information you needed.

05 October, 2009

Configuring permissions with SCCM

Object

Rights to create

Rights to modify

Rights to delete

Rights to distribute

Boot Images

Create\Boot image package, Read\Boot image package

Modify\Boot image package, Read\Boot image package

Delete\Boot image package, Read\Boot image package

Read\Boot image package, Modify\Boot image package, Distribute\Boot image package, Read\Site

Computer Association

Create\Computer association, Read\Computer association, Read\Collection

Modify\Computer association, Read\Computer association

Delete\Computer association, Read\Computer association

Not applicable

Operating System Images

Create\OS image, Read\OS image

Modify\OS image, Read\OS image

Delete\OS image, Read\OS image

Modify\OS image, Read\OS image, Distribute\OS image, Read\Site

Operating System Install Pacakges

Create\OS install package, Read\OS install package

Modify\OS install package, Read\OS install package

Delete\OS install package, Read\OS install package

Modify\OS install package, Read\OS install package, Distribute\OS install package, Read\Site

Task Sequences

Create\Task sequence package, Read\Task sequence package, Modify\Task sequence package

Modify\Task sequence package, Read\Task sequence package

Delete\Task sequence package, Read\Task sequence package

Modify\Task sequence package, Read\Task sequence package, Distribute\Task sequence package, Read\Site

Advertisement (for task sequence)

Read\Task sequence package, Read\Collection, Advertise\Collection, Read\Package, Create\Advertisement

Modify\Advertisement, Read\Advertisement

Delete\Advertisement, Read\Advertisement

Not applicable

Task sequence bootable media

Read\Task sequence package, Create Task sequence media\Task sequence package, Read\Site, Manage OSD and ISV Proxy Certificates\Site, Read\Boot image

Modify\Task sequence package, Read\Task sequence package

Delete\Task sequence package, Read\Task sequence package

Not applicable

Drivers

Create\Device driver, Read\Device driver

Modify\Device driver, Read\Device driver

Delete\Device driver, Read\Device driver

Not applicable

Driver package

Create\Driver package, Read\Device driver

Modify\Driver package, Read\Driver package, Distribute\Driver packages

Delete\Driver package, Read\Driver package

Not applicable

Please let me know if the above article was able to provide you with the information you needed.